
Browse Help Center guides
Start here
First 15 minutes with Watchfox
Create your first Uptime monitor, verify a real check, add an email alert channel, and send a test alert.
What you will achieve#
By the end of this guide you will have a real monitor, at least one completed check, an alert channel, and a successful test alert. This is the basic Watchfox activation path.
Start with an Uptime monitor. Keyword monitoring is useful, but page caches, redirects, JavaScript-rendered content, and large responses can make it a less predictable first test.
0–2 minutes: Open the right project#
- Sign in to Watchfox and open Monitors.
- Use the project selector in the left sidebar to confirm where the monitor should live.
- Use one project for one client, website, product, or logical service group.
For an agency, create separate projects for separate clients. This keeps monitors, alert channels, status pages, reports, and exports clearly separated.
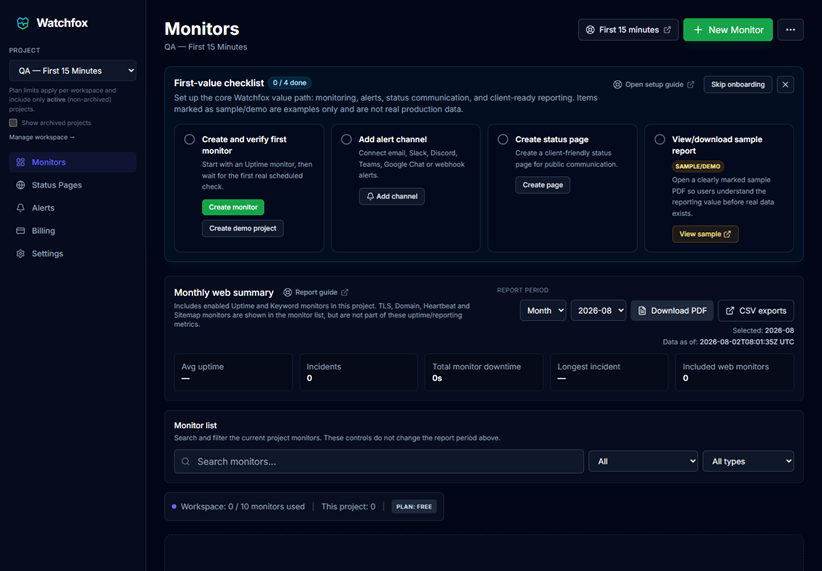
2–7 minutes: Create an Uptime monitor#
- Click New Monitor.
- Select Uptime under Monitor Type.
- Enter a Friendly Label, for example
Client website. - Enter the URL / Endpoint, for example
https://example.com/. You may also enterexample.com; Watchfox assumes HTTPS when no scheme is supplied. - Keep the fastest interval available on your current plan.
- Leave probe coverage on Automatic.
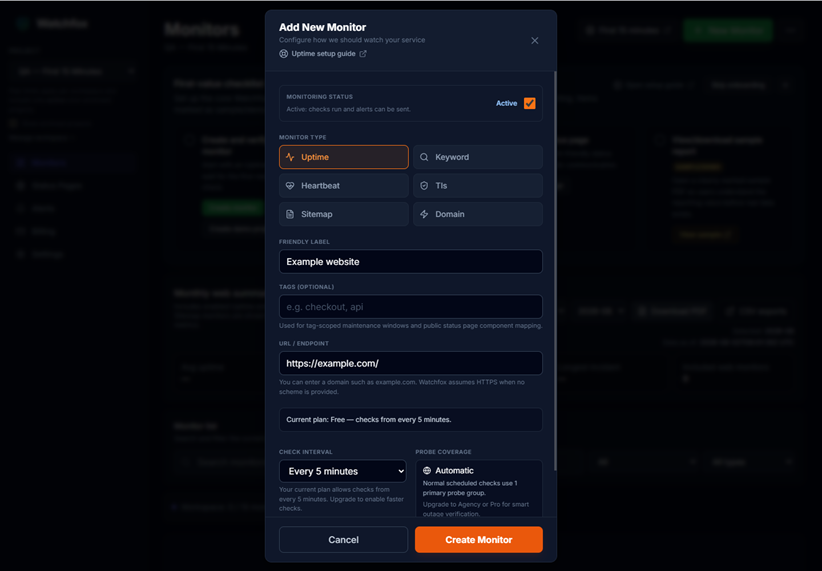
- Open Alerting (optional) and keep the recommended first-monitor values below.
- Click Create Monitor.
Recommended first-monitor values#
- Timeout:
10000 ms. - Expected HTTP status: empty, which accepts
200–399. - First alert delay:
0seconds for the initial controlled test. - Repeat reminders: Off until you decide how often the team should be reminded.
- Send recovery alert: enabled.
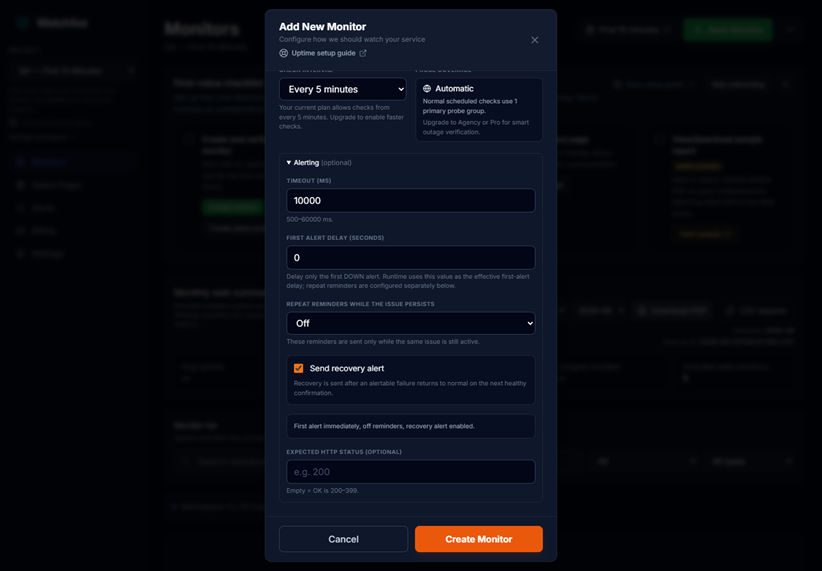
Only set Expected HTTP status to 200 when a redirect should genuinely be treated as a failure. Many normal websites redirect from a bare domain to a canonical URL.
7–12 minutes: Verify the first real check#
Creating a monitor is not enough. Wait for a real scheduled result before considering the first step complete.
- Wait up to approximately one configured check interval.
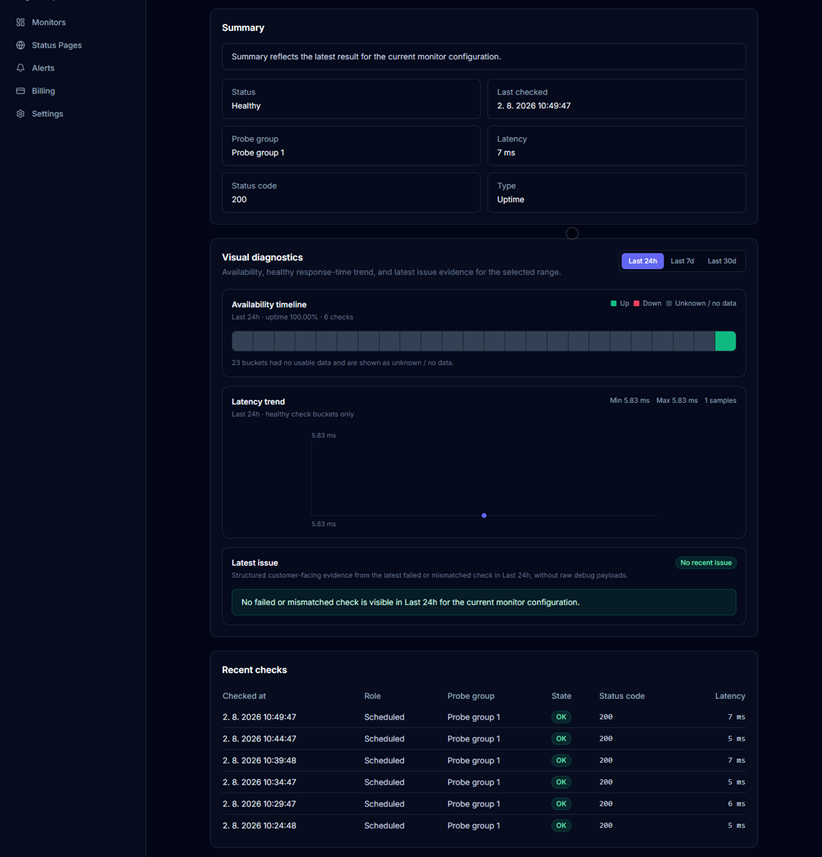
- Open the monitor detail.
- Confirm that Last checked contains a time and Recent checks contains a row for the current configuration.
- Review the state, HTTP status, latency, and final URL evidence when available.
Expected result#
A healthy website normally shows an Up/healthy state and at least one successful recent check. If the result is Down, Unknown, or still missing after the expected interval, use Troubleshooting by symptom instead of deleting the monitor immediately.
12–15 minutes: Add and test an alert channel#
- Open Alerts from the left sidebar.
- In notification channels, choose email.
- Enter an email address and add the channel.
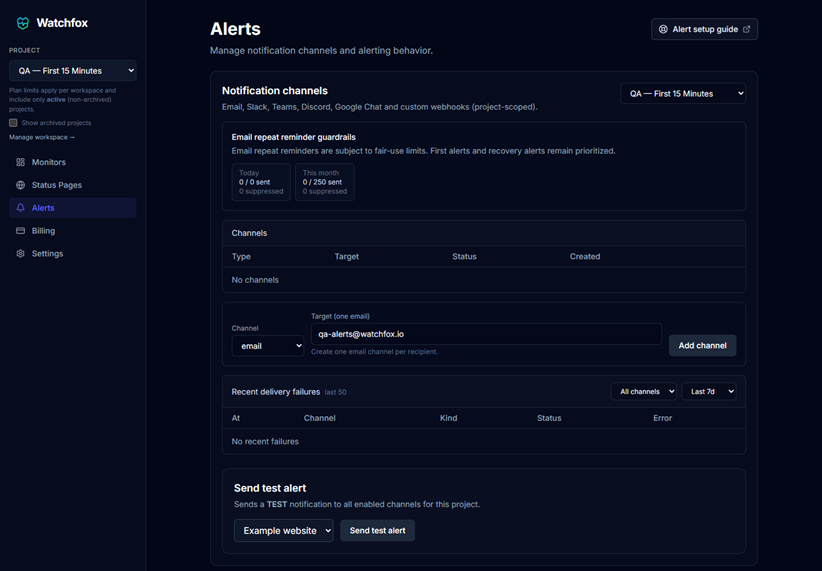
- Open Send test alert.
- Select the monitor you just created.
- Click Send test alert.
- Confirm the success message in Watchfox and verify the email arrived.
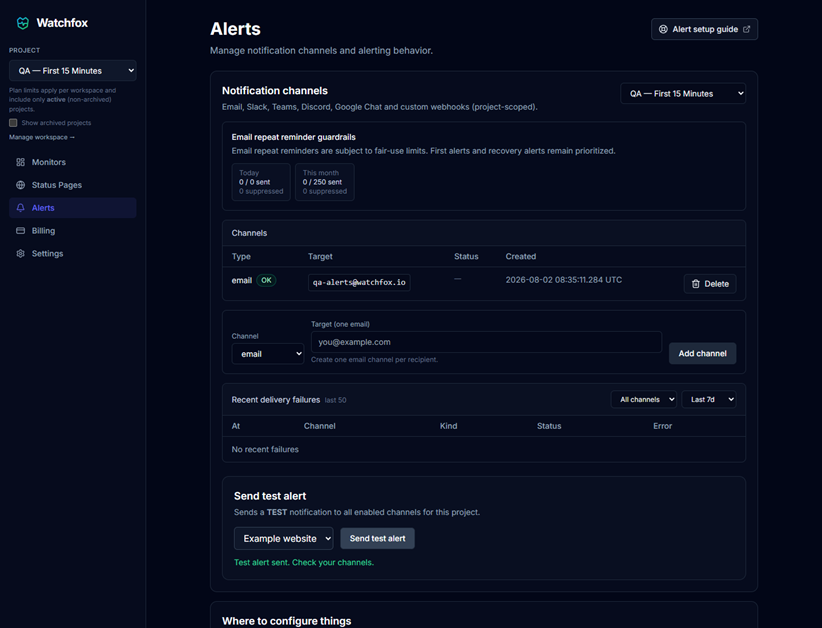
One email channel represents one recipient. Add another email channel when another person should receive alerts.
A test alert checks channel delivery. It does not create a real monitor outage or incident.
Completion checklist#
- Monitor created in the correct project.
- First real check completed.
- Alert channel added.
- Test alert received.
What to do next#
- Read Set up Watchfox for an agency or freelancer when you manage several clients.
- Create a client-facing status page.
- Open the sample report now and generate a real report after monitoring data accumulates.
- Add a second monitor type only when it represents another real question you need Watchfox to answer.